- Published at
Methods of testing Databricks Asset Bundles
Easily test Databricks Asset Bundles in notebook without the need to switch into a CLI interface
- Authors
-
-

- Author name
- Nathan Holland
- Author LinkedIn
- Linkedin: nathanholland
Authors
-
-
Share
Table of Contents
- Introduction
- Summary
- Worked example
- Using notebooks (unsupported)
- Step 1: Clone the repository
- Step 2: Navigate to the deployment notebook and validate
- Step 3: Deploy the bundle
- Step 4: Validate the resources and tear them down after use.
- Step 5 : Teardown
- Manual deployments using Azure Cloud Shell
- Step 1 : Open the Azure Cloud Shell
- Step 2 : Install the Databricks CLI and validate your bundle
- Step 3 : Install the Databricks CLI and validate your bundle
- Step 4 : Remove the deployment
- Manual deployments using the Databricks Web Terminal
- Wishlist
- Native support for deploying bundles in the interface
- Don’t commit widget state as part of IPYNB files
- Better token support for running third party software in a workspace
- Better Databricks CLI bootstrapping support for Azure Databricks
Introduction
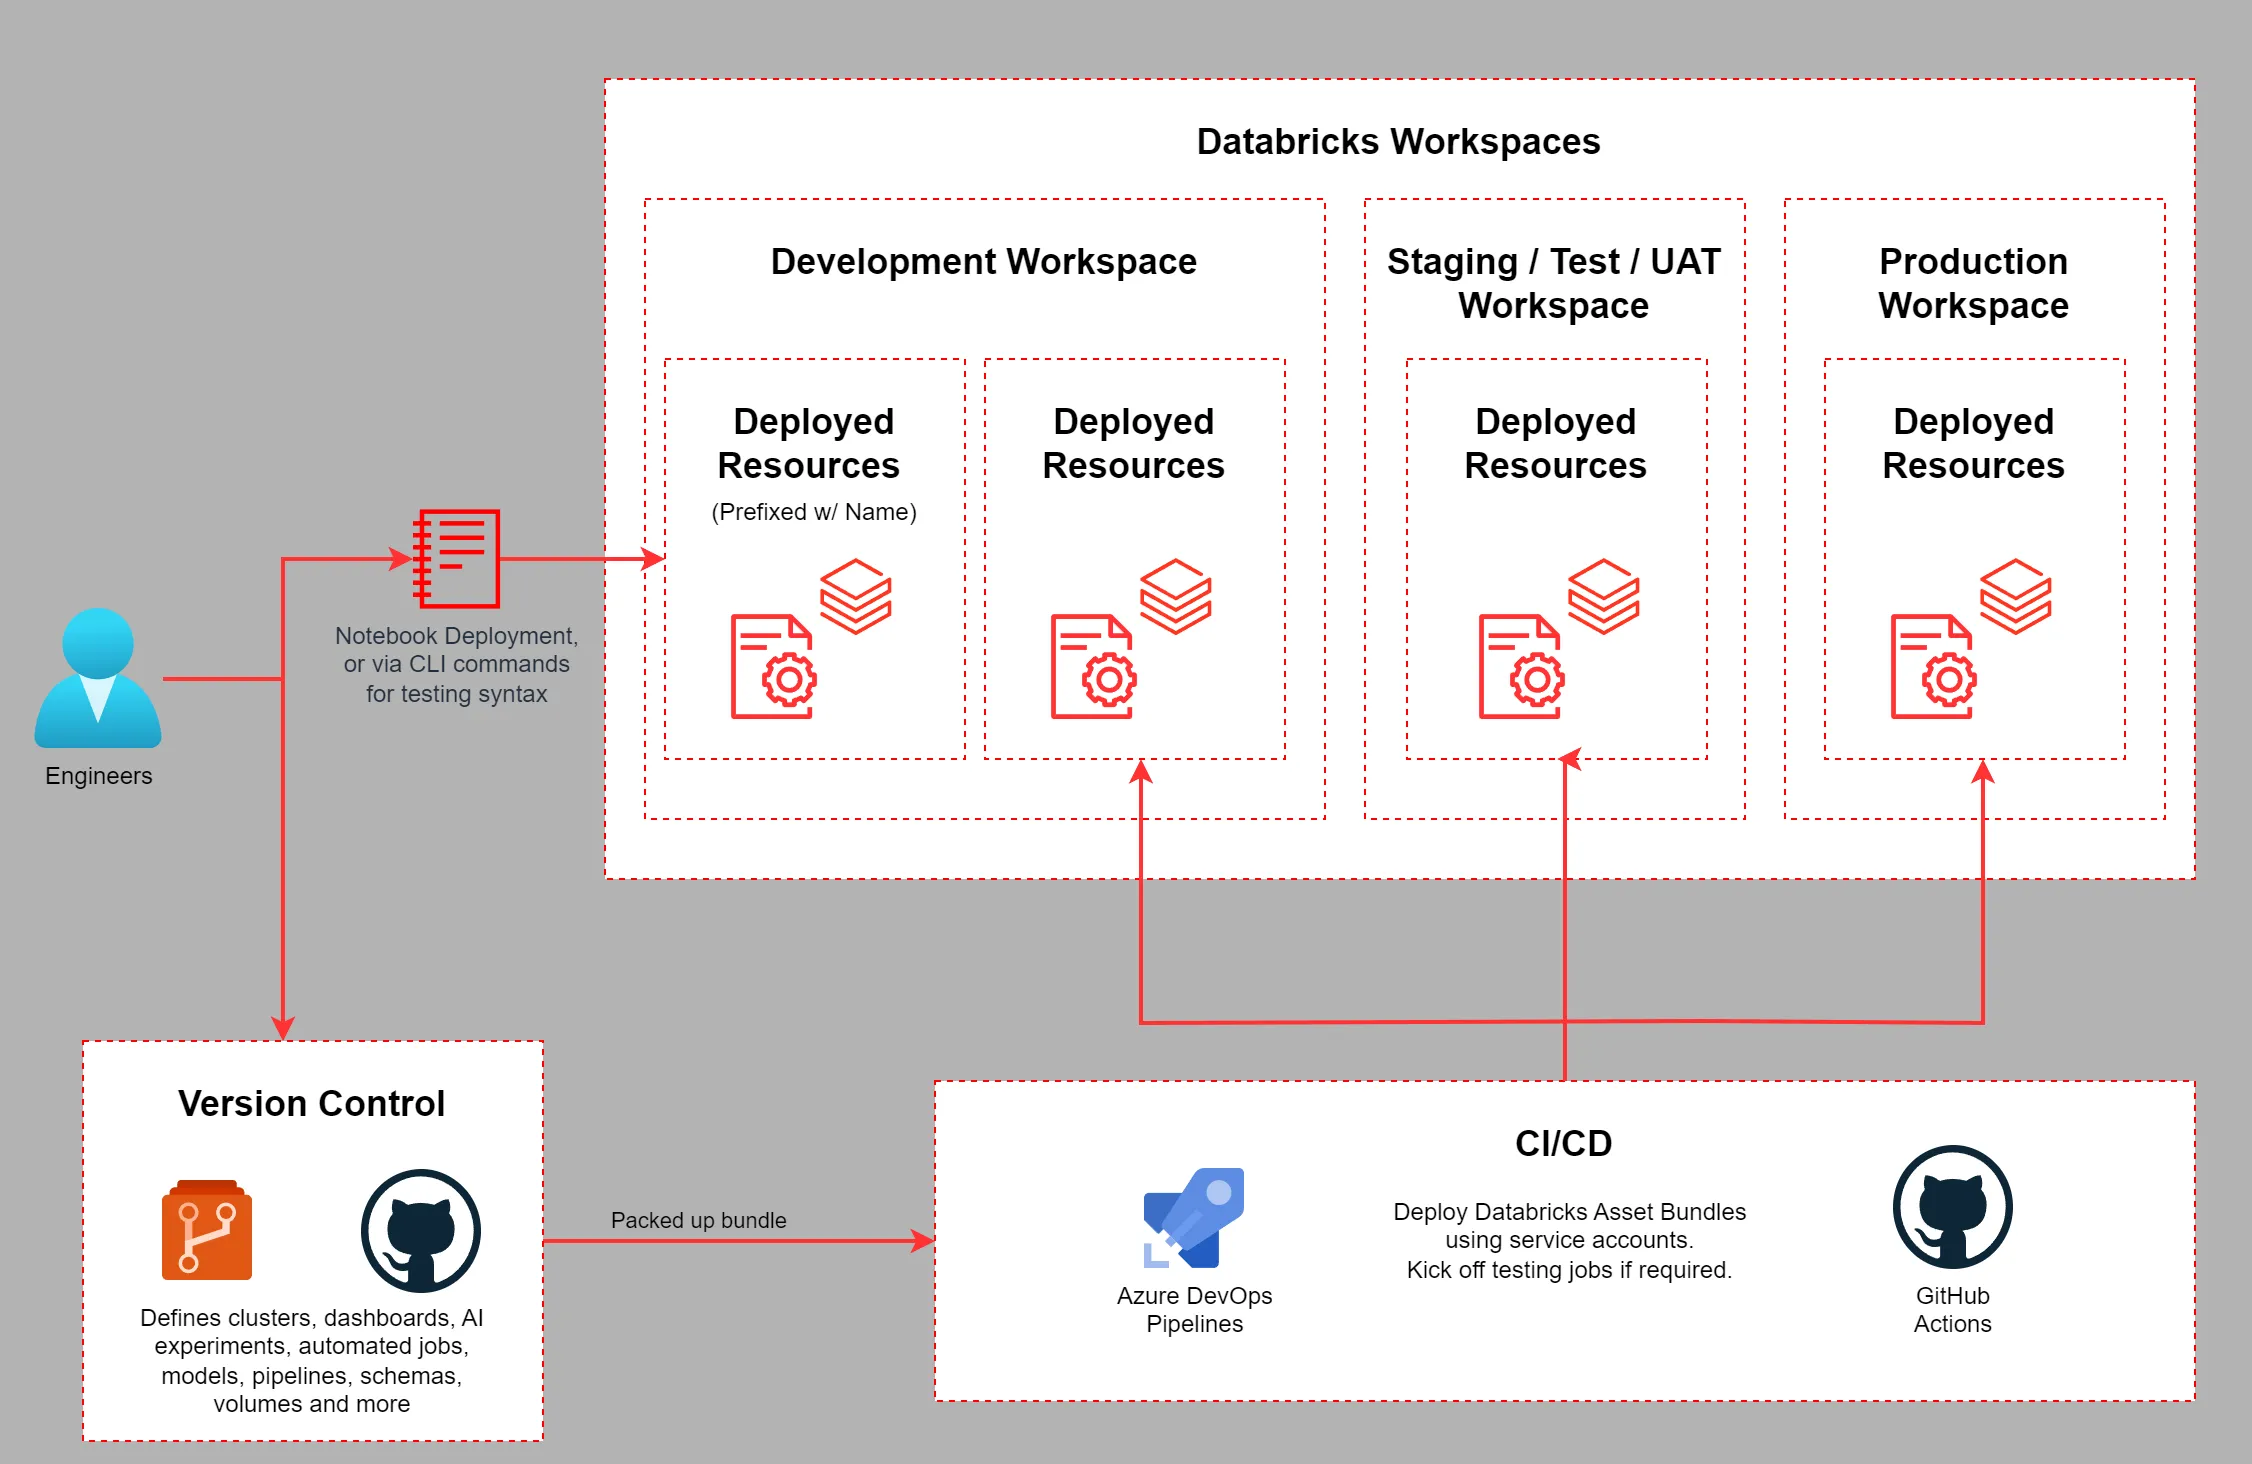
Databricks Asset Bundles make it straightforward to adopt and deploy software engineering best practices when working on Data & AI workloads. These practices include the use of source control, pull requests, automated testing; and to encourage using only CI/CD processes to deploy code to ensure self-documented reliable releases.
Databricks Asset Bundles let you describe common resources such as jobs, pipelines, schemas, volumes, experiments, compute clusters, and notebooks as source files, giving you a full, end-to-end definition of your project. This approach streamlines collaboration during development allowing an entire workload to be deployed in a reproducible way.
DABs were historically developed locally using a command line tool or external IDE. Using an external tool was inconvenient for those who would like to do all their development in the Databricks Workspace IDE.
With programmatic manipulation of notebooks, this process can now be run in notebooks, making it easier for those who would like to build and test their bundles without the need to configure any external tools.
Summary
Databricks Asset Bundles are a killer feature for deploying any Databricks workloads in a repeatable and testable way but some organisations limit the installation of tooling on local compute, or have a preference for using the Databricks Workspace IDE for all development.
Getting this working in the past was possible, but required a few compromises - with 16.2 we can unofficially deploy the files using ‘Dedicated’ compute as this notebook example shows.
This pattern described in the notebook above may help engineers that work with notebooks and don’t want to switch context to a CLI when building and testing DAB bundles. It goes without saying do not use this method for deploying any code to production - you should use your CI/CD systems instead.
For those who want to develop in an external IDE, I’d recommend using the Visual Studio Code extension for Databricks; which has a great guide on how to deploy bundles.
For those who do not have permissions to install tooling on their local computers, read on!
- Using Notebooks in the Databricks Workspace IDE (unsupported)
- Manual deployments using Azure Cloud Shell
- Manual deployments using the Databricks Web Terminal
Worked example
I’ll be working in Azure using the Databricks Asset Bundle examples. As the compute names are different from cloud to cloud - I’ve forked off a copy of the branch to make this a bit easier. This tutorial will assume you have a basic understanding of Databricks, asset bundles, Git and have an existing paid environment in Azure.
I’ll be showing an unsupported method using notebooks to deploy bundles, and touch on using the Azure Cloud Shell CLI.
Using notebooks (unsupported)
The following process will only work in Single Node cluster running the Databricks Cluster version 16.2, not shared or serverless. If you are using either of those technologies, move on to the supported methods. As mentioned earlier, this is not a production supported deployment method and serves to help those who cannot run the Databricks CLI using the supported methods due to restrictions such as the inability to install software on their local computers.
-
Step 1: Clone the repository
For this example we’ll be using the bundle-examples-azure source control repository to deploy to our Azure Databricks workspace using your already configured Personal Compute cluster running the Databricks Runtime 16.2 or above.
-
First create a new Git Folder by navigating to the workspace, your home folder, the create button then finally the
Git Folderoption.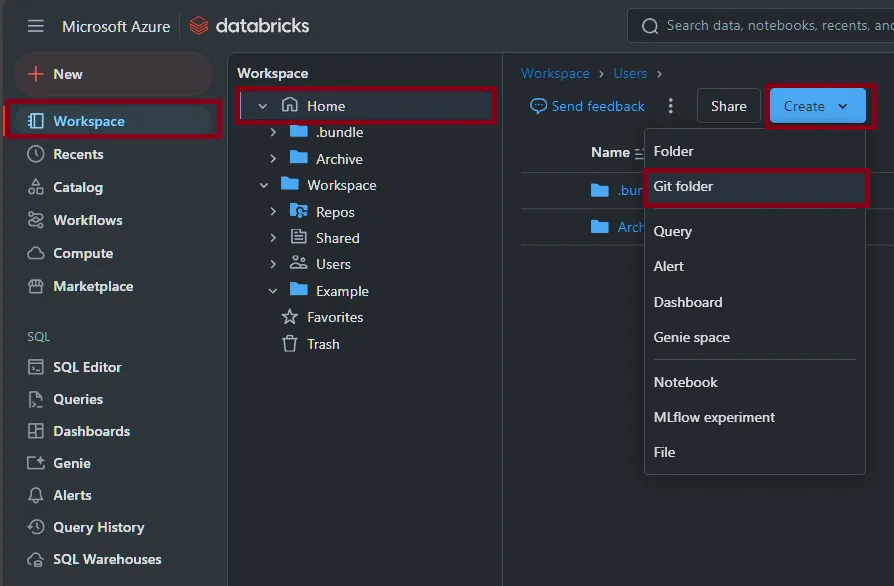
-
In the Git Folder popup menu copy the URL
https://github.com/NathanNZ/bundle-examples-azure.gitand paste it into theGit repository URLspot, then clickCreate Git Folder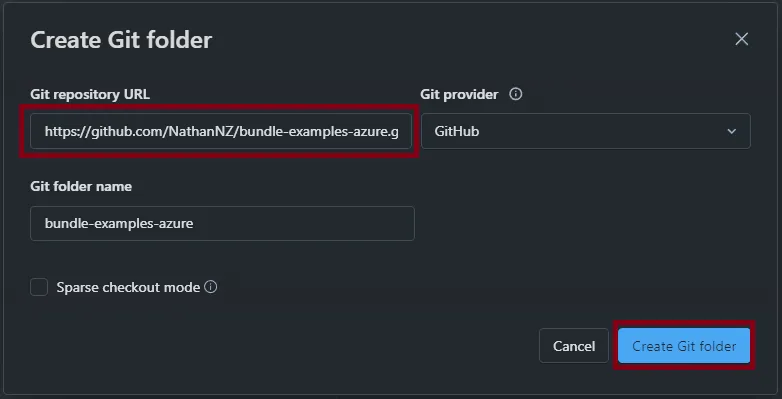
-
-
Step 2: Navigate to the deployment notebook and validate
-
The git repository will clone and you should see some files; click on the
dev_example_bundle_deploynotebook and then clickRun All, selecting your personal compute cluster as the runner. You cannot use serverless or shared clusters.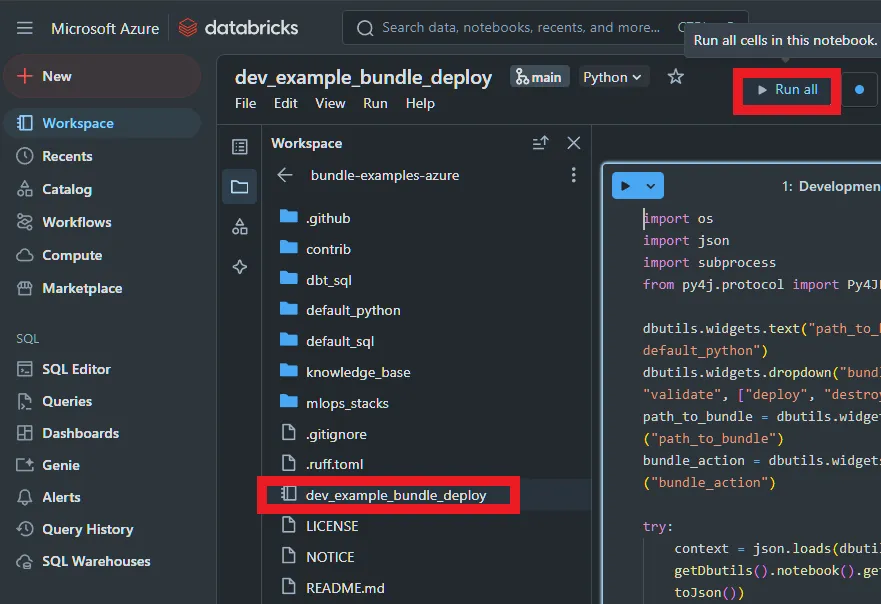
-
If all goes well, you should see
Validation OK!; this means we’re good to go to deploy the Databricks asset bundle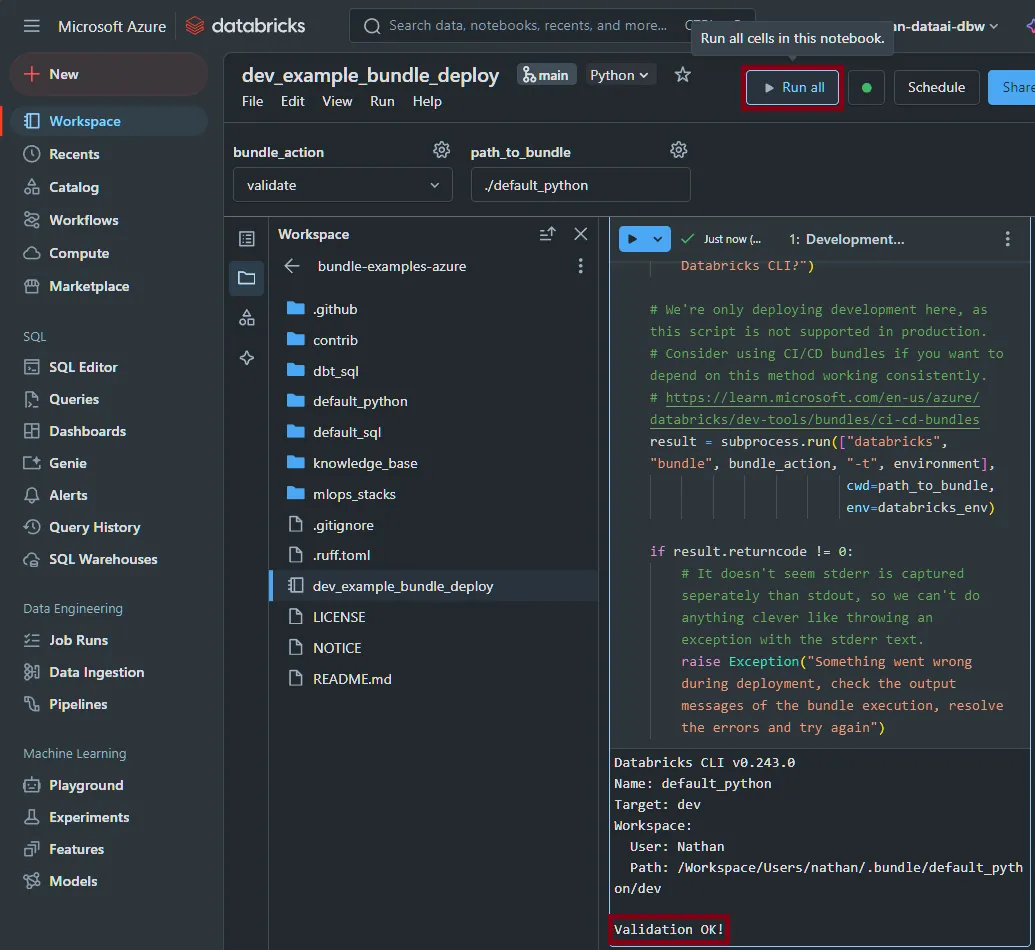
-
-
Step 3: Deploy the bundle
Change the widget in the top left to
deployand run it again, the custom library that the example shows will be built and the two pipelines deployed.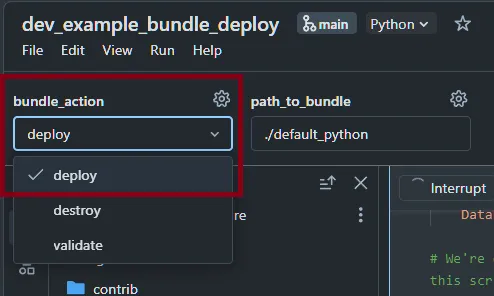
-
Step 4: Validate the resources and tear them down after use.
-
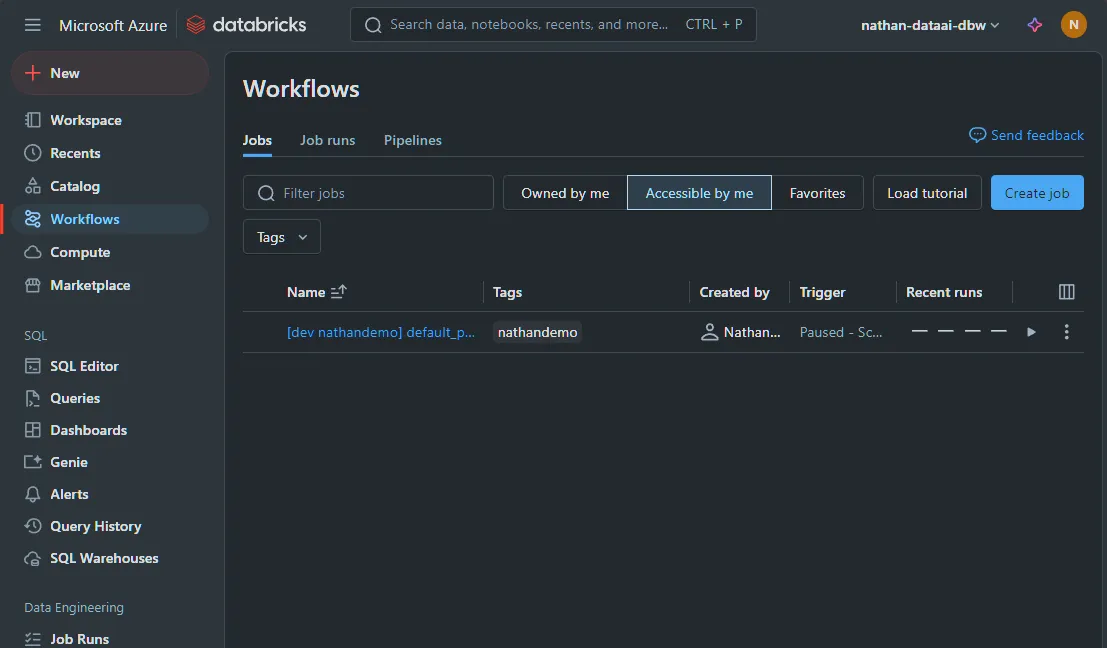
We can now look at our newly deployed resources, we should see them matching the resources defined in the following locations:
-
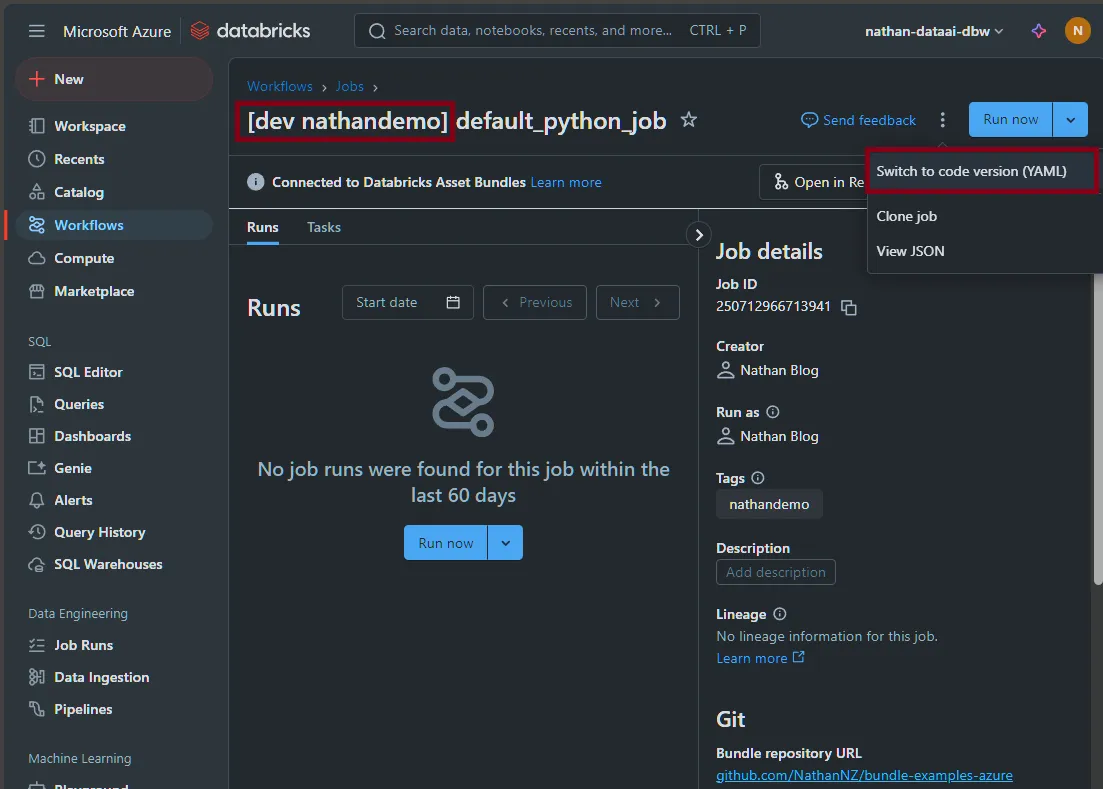
If we click into one of the jobs, we can view the YAML using the
Switch to code version (YAML)option. This is especially useful when building new bundles or porting existing workflows across. Notice that there is a prefix before the job name; in my case this is[dev nathandemo]. This happens automatically due to us having the development mode set. This ensures that triggers do not automatically run and any other bundles deployed by other users or a CI/CD pipeline can easily be told apart. -
-
-
Step 5 : Teardown
Finally go back to the notebook we were using in Step 3, select
destroyand run the notebook to clean up all the resources you created. Double check they have been removed by going back to the workflows page (and pipelines section if you don’t have the preview enabled that combines those in one view). You may also want to terminate your compute cluster if it is still running.
Manual deployments using Azure Cloud Shell
Using the Azure Cloud Shell is another method to enable deployments without needing to install anything locally - but using GitHub Actions or Azure DevOps is a much better option if you are doing this outside of a test environment.
I’m not quite sure why the configure method in the above example encourages the use of a PAT token, but I suggest using Azure CLI auth or a Azure Entra ID token where possible. For this example you’ll need to update <workspace-url> with your own workspace URL (e.g: https://adb-5465465465456.01.azuredatabricks.net/). Outside of cloud-shell you can remove the DATABRICKS_TOKEN line and use the az login command to authenticate instead.
-
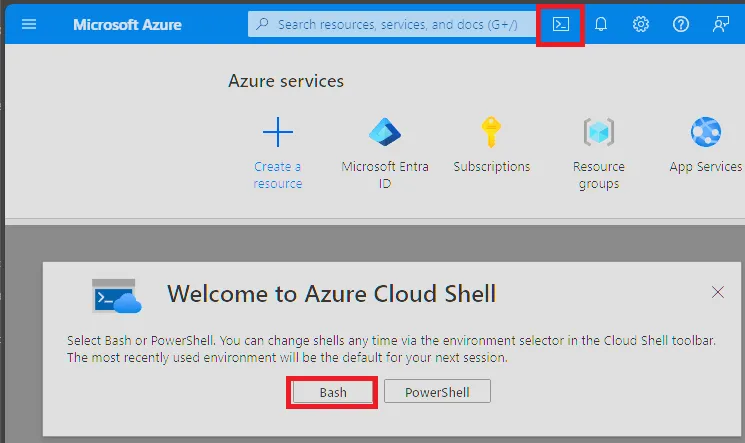
Step 1 : Open the Azure Cloud Shell
Jump into Azure, click the console icon in the top right corner and select “Bash” to open the Azure Cloud Shell
-
Step 2 : Install the Databricks CLI and validate your bundle
git clone https://github.com/NathanNZ/bundle-examples-azure curl -fsSL -o databricks_cli.zip https://github.com/databricks/cli/releases/download/v0.243.0/databricks_cli_0.243.0_linux_amd64.zip unzip databricks_cli.zip -d databricks export PATH=$PATH:$HOME/databricks export DATABRICKS_HOST="<workspace-url>" export DATABRICKS_TOKEN=$(az account get-access-token --resource 2ff814a6-3304-4ab8-85cb-cd0e6f879c1d --query "accessToken" -o tsv) cat > ~/.databrickscfg <<EOL [DEFAULT] host = "$DATABRICKS_HOST" EOL cd ./bundle-examples-azure/default_python/ databricks bundle validate -t dev -
Step 3 : Install the Databricks CLI and validate your bundle
Since our example builds a Python Wheel, we need to install the wheel package before deploying the bundle.
pip install wheel databricks bundle deploy -t dev -
Step 4 : Remove the deployment
databricks bundle destroy -t dev
Manual deployments using the Databricks Web Terminal
There is also the option to run Databricks Asset Bundles using the Web Terminal if your environment supports it. This method works across both Azure and AWS clouds in a very similar manner and is well documented below.
Wishlist
As is starting to be tradition, here are a few features it would be great to see the Databricks team implement in the future!
-
Native support for deploying bundles in the interface
It would be super useful to be able to deploy bundles directly from the workspace interface - this would make it much easier to test and deploy bundles without needing to use the CLI or API. This could be as easy as having an option to deploy when opening a
databricks.yamlfile and have a background process deploy the bundle, or go full out and implement the feature set currently added as an extension in Visual Studio Code. -
Don’t commit widget state as part of IPYNB files
It’s really nice to have a “default” for a widget that’s set by code, storing the overridden value in notebooks can make for a very chatty commit history. Using Python files for notebooks are often easier to read compared to the IPYNB JSON files, however there are limitations with using Python files, such as the inability to select the default serverless environments, so it’s a tradeoff at present!
-
Better token support for running third party software in a workspace
There are more than a few tools that expect to get the Databricks Workspace & Token to run (such as DBT), being to request a temporary token, and retrieve the workspace URL from serverless compute and shared clusters would make it good for those who want to use Databricks as a unified development platform.
-
Better Databricks CLI bootstrapping support for Azure Databricks
As far as I can tell the CLI doesn’t support a way to configure an endpoint without a token. A method like
databricks configure -host <host_name> -use_external_authrather than having to manually create a~/.databrickscfgfile would make security teams very happy!